Easy 40-Minute Beef and Cheese Chimichangas
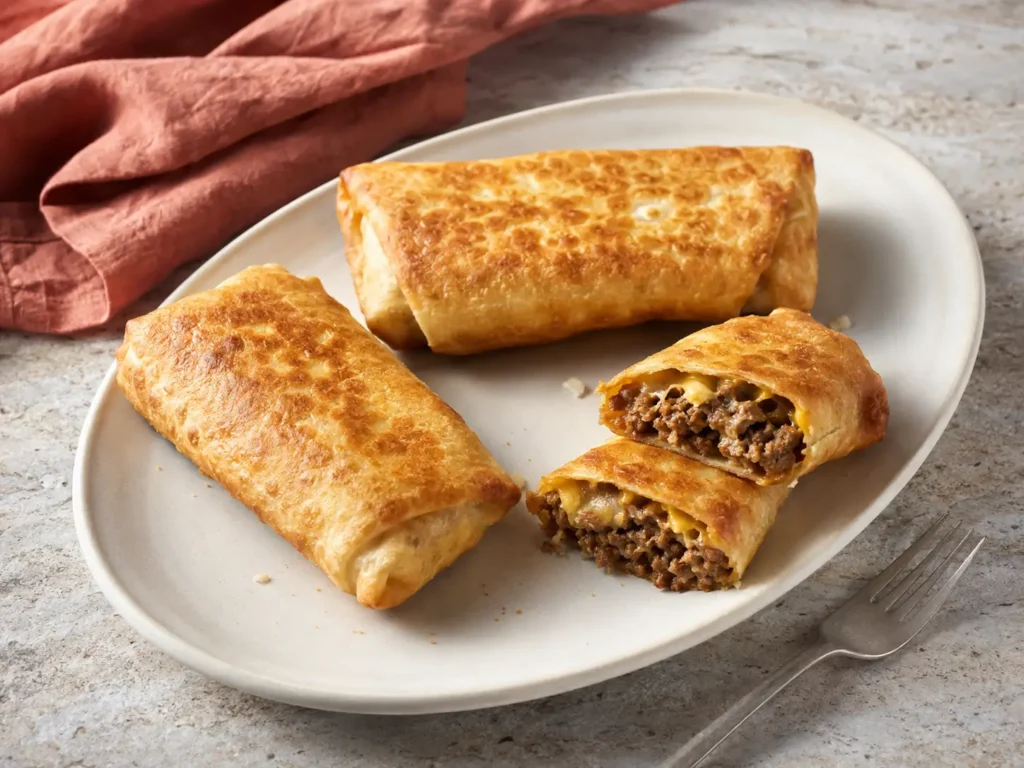
Beef and Cheese Chimichangas turn a handful of familiar ingredients into a satisfying meal with plenty of texture. Each large flour tortilla holds seasoned ground beef, creamy refried beans, salsa, and melted cheese, then cooks until the outside is crisp and golden. The filling stays rich and moist without becoming runny, while the toasted tortilla gives every bite a welcome crunch.
You can bake the chimichangas for an evenly crisp shell or brown them in a skillet for a deeper, more concentrated crust. Both methods begin with the same straightforward filling and tightly folded tortilla. Serve them whole for a hearty dinner, or cut them in half so the layers of beef, beans, and cheese are visible on the plate. (The Fervent Mama)
What Makes These Chimichangas Worth Making
The contrast between the crunchy tortilla and soft, cheesy center is the defining feature of this recipe. Refried beans help anchor the loose ground-beef filling, which makes the tortillas easier to roll and less likely to spill during cooking.
The recipe also gives you two practical cooking options. Baking is convenient when preparing the full batch at once, while skillet cooking develops a crisp exterior quickly without requiring a deep fryer. Because the beef mixture is cooked before assembly, the final cooking stage is mainly about heating the center, melting the cheese, and browning the tortilla. (The Fervent Mama)
These chimichangas also work well for advance preparation. They can be assembled ahead of time and cooked when needed, making them useful for busy evenings when you want most of the chopping and stovetop work finished early.
Key Ingredients and What They Do
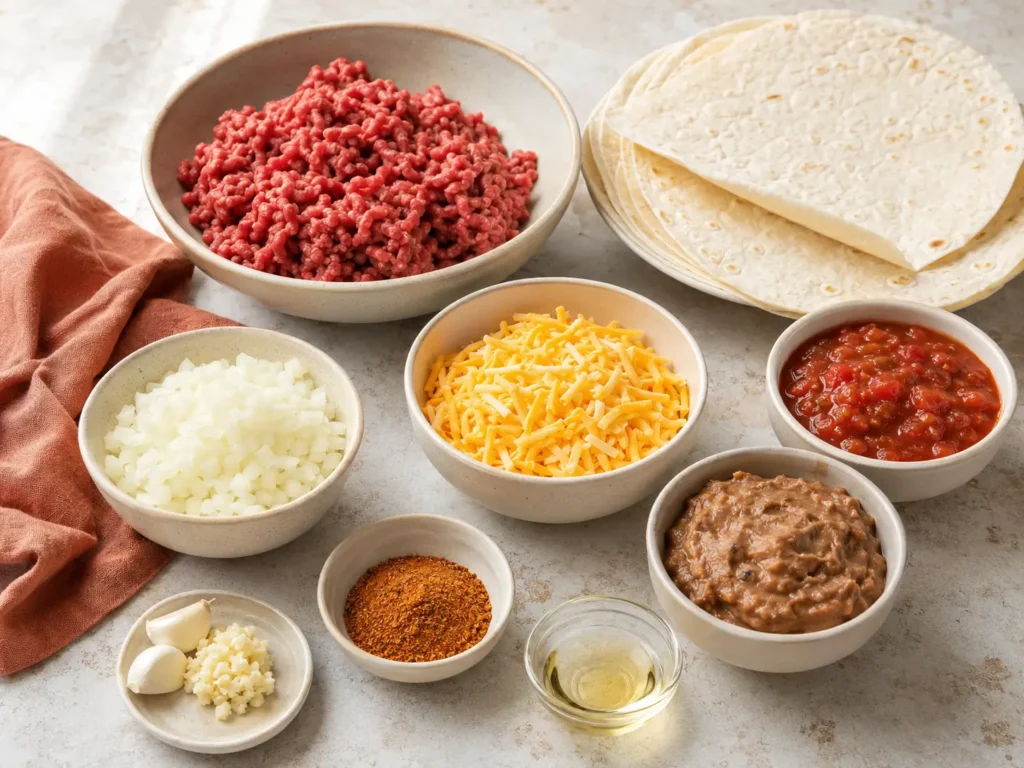
- Ground beef: Lean ground beef provides a hearty filling without leaving too much grease in the skillet. Drain any visible excess fat before adding the seasonings so the tortillas do not become oily or soggy.
- Onion and garlic: Finely diced onion softens alongside the beef, while garlic is added after browning so its flavor stays noticeable without scorching.
- Taco seasoning: A packaged blend keeps preparation efficient. A homemade combination featuring chili powder, cumin, paprika, garlic, and salt can also provide the warm, savory flavor the filling needs.
- Salsa: Salsa adds acidity, moisture, and tomato flavor. Use a salsa with a texture you enjoy, but avoid an especially watery variety because excess liquid can weaken the tortillas.
- Refried beans: Choose refried beans prepared with vegetable oil. Their thick, creamy consistency creates a base for the filling and helps keep the beef in place as each tortilla is folded.
- Shredded cheese: Cheddar or a Mexican-style cheese blend melts into the warm beef. Freshly shredded cheese generally melts more smoothly, while pre-shredded cheese is a convenient alternative.
- Large flour tortillas: Burrito-size tortillas provide enough surface area to enclose the filling securely. Warm them briefly before rolling if they feel stiff or begin cracking at the edges.
- Vegetable oil: A light coating promotes browning in the oven and helps the skillet-cooked version develop its crisp crust.
See the recipe card below for the complete ingredient list and exact measurements. (The Fervent Mama)
How to Make Beef and Cheese Chimichangas
- Brown the beef and onion. Cook the ground beef with the diced onion in a large skillet over medium heat. Break the meat into small crumbles as it cooks so the filling distributes evenly. Continue until no pink remains and the onion is tender, then drain away excess grease.
- Season and thicken the filling. Stir in the minced garlic, taco seasoning, and salsa. Let the mixture simmer for 3 to 4 minutes. It should smell fragrant and look moist but not soupy. Allowing the salsa to reduce slightly helps prevent liquid from soaking through the tortillas.
- Prepare the tortillas. Lay the flour tortillas on a clean work surface. If they are not flexible, warm them just enough to make folding easier. A soft tortilla will form a tighter package with fewer cracks.
- Layer the filling. Spread refried beans down the center of each tortilla, leaving room around the edges. Add the seasoned beef and finish with shredded cheese. Keep the filling in a compact strip rather than spreading it across the entire tortilla.
- Fold and roll. Bring the left and right sides inward over the filling. Fold the bottom edge up, then roll firmly toward the top. The finished chimichanga should feel snug but not stretched. Place it seam-side down while assembling the remaining tortillas.
- Choose a cooking method. For the oven method, arrange the chimichangas seam-side down on a greased baking sheet, brush them lightly with vegetable oil, and bake at 400°F. Flip them once and continue baking until golden and crisp, about 18 to 20 minutes in total. For the skillet method, heat a shallow layer of oil over medium heat. Cook the chimichangas seam-side down first, then turn them carefully and brown each side for about 2 to 3 minutes.
- Rest before serving. Let the cooked chimichangas stand for about 2 minutes. This brief pause allows the cheese and filling to settle, making them easier to cut and less likely to spill immediately. (The Fervent Mama)
Tips for Crisp, Well-Sealed Chimichangas
Keep the filling relatively dry. The salsa should coat the beef rather than pool at the bottom of the skillet. A wet filling can soften the tortilla from the inside and may leak through the seams.
Do not overfill the tortillas. Extra filling may sound appealing, but it makes the sides difficult to tuck and puts pressure on the tortilla as it cooks. Divide the components evenly so every chimichanga closes securely.
Start with the seam facing down. Whether baking or using a skillet, placing the folded edge against the hot surface helps seal the package before it is turned.
Watch the skillet temperature. Oil that is not hot enough can soak into the tortilla. Oil that is excessively hot may darken the exterior before the cheese melts. Medium heat should produce steady sizzling and gradual golden browning.
Use a light touch when flipping. Turn each chimichanga with a wide spatula or tongs, supporting the center so the folded tortilla does not open.
Leave space between pieces. Crowding traps steam and slows browning. On a baking sheet, arrange the chimichangas with space around each one. When using a skillet, work in batches if necessary.
Variations and Smart Substitutions
For a spicier filling, add finely diced jalapeño or replace part of the cheddar with pepper Jack cheese. Both changes increase the heat without altering the basic assembly method.
Black beans can replace the refried beans, although the filling will be looser and less creamy. Drain them thoroughly and lightly mash some of the beans so they help hold the beef mixture together.
Ground chicken or ground turkey may be used instead of ground beef. Because these meats are typically leaner, watch them closely during browning and avoid cooking them longer than necessary. The finished filling will have a lighter flavor and may be less rich.
For additional creaminess, spread a slightly thicker layer of the vegetable-oil-prepared refried beans inside each tortilla. Avoid adding extra salsa at the same time, since too much moisture can interfere with crisping.
What to Serve With Them
Serve the chimichangas with cool, fresh toppings that balance the warm beef and melted cheese. Sour cream adds tang and richness, while guacamole contributes a creamy texture without making the tortilla soggy when served on the side.
Pico de gallo or a spoonful of salsa brings brightness and acidity. Shredded lettuce adds a crisp, fresh element, especially when the chimichangas are served as a full dinner. For a more substantial plate, add seasoned rice, black beans, or a simple corn salad.
Keep wet toppings beside the chimichangas rather than spooning them over the crust until serving. This preserves the crisp exterior for longer.
Make-Ahead, Storage, and Reheating
To prepare the chimichangas in advance, assemble them without cooking and wrap them securely. They can be refrigerated for up to 2 days before baking or skillet cooking. Keep them seam-side down so the folded edges hold their shape.
For freezing, arrange the uncooked chimichangas on a baking sheet until firm, then transfer them to a freezer-safe bag or container. They may be frozen for up to 2 months. The source recipe allows them to be cooked from frozen with additional cooking time, although the exact extra time will depend on the cooking method and thickness of the filling.
Cool cooked leftovers before placing them in an airtight container. Refrigerate for up to 3 days. Reheat them in an oven or air fryer until the center is hot and the tortilla has regained some crispness. Microwave reheating is less suitable when texture matters because it tends to soften the tortilla. (The Fervent Mama)
Serve Them While the Tortillas Are Crisp
Beef and Cheese Chimichangas are especially satisfying when served hot, while the tortillas are still crisp and the cheese is fully melted. Let them rest briefly after cooking so the filling stays in place when cut. Keep salsa, sour cream, guacamole, and other moist toppings on the side to preserve the golden exterior. Add a simple rice, bean, or corn side and bring them straight to the table.
Frequently Asked Questions About Beef and Cheese Chimichangas
Can I assemble the chimichangas ahead of time?
Yes, you can assemble the chimichangas and refrigerate them for up to 2 days before cooking. Wrap them securely and store them seam-side down so they hold their shape. Wait to brush them with oil until you are ready to bake or brown them.
Why are my chimichangas not getting crispy?
Excess moisture, crowded cooking surfaces, or oil that is not hot enough can prevent crisping. Drain the beef well, use a thick salsa, and simmer the filling until no liquid pools in the skillet. Leave space between the chimichangas so hot air or oil can reach each side.
Can I bake them instead of cooking them in a skillet?
Yes, arrange the filled tortillas seam-side down on a greased baking sheet and lightly brush them with vegetable oil. Bake at 400°F, turning once, until the surfaces are golden and crisp. Baking is especially convenient when cooking the entire batch at the same time.
How should I store and reheat leftovers?
Cool leftover chimichangas before transferring them to an airtight container, then refrigerate them for up to 3 days. Reheat them in an oven or air fryer until the filling is hot and the tortilla is crisp again. A microwave will warm them, but it usually produces a softer exterior.
Easy 40-Minute Beef and Cheese Chimichangas

Beef and Cheese Chimichangas combine seasoned ground beef, creamy refried beans, salsa, and melted cheese inside flour tortillas. Baking gives the rolled tortillas a crisp, golden exterior while keeping the filling warm, savory, and satisfyingly cheesy.
- Prep Time: 15 minutes
- Cook Time: 25 minutes
- Total Time: 40 minutes
- Yield: 6 chimichangas 1x
- Category: Main Course
- Method: Baking
- Cuisine: Tex-Mex
Ingredients
- 1 pound lean ground beef
- 1 small onion, finely diced
- 2 cloves garlic, minced
- 1 (1-ounce) packet taco seasoning
- 1/2 cup salsa
- 1 cup refried beans prepared with vegetable oil
- 1 1/2 cups shredded cheddar cheese or Mexican-style cheese blend
- 6 large burrito-size flour tortillas
- 2 tablespoons vegetable oil, for brushing
Instructions
- Preheat the oven to 400°F and lightly grease a baking sheet.
- Place a large skillet over medium heat. Add the ground beef and onion, breaking the meat into small crumbles as it cooks. Continue until the beef is browned and the onion is tender, then drain off excess grease.
- Stir in the garlic, taco seasoning, and salsa. Simmer for 3 to 4 minutes, until the mixture is evenly seasoned and moist but no liquid pools in the pan.
- Lay out the tortillas. Spread the refried beans down the center of each one, then divide the beef mixture and shredded cheese evenly among them.
- Fold both sides of each tortilla over the filling, bring up the bottom edge, and roll tightly to form a closed package. Arrange the chimichangas seam-side down on the prepared baking sheet.
- Brush the tortillas lightly with the vegetable oil. Bake for 18 to 20 minutes, turning once, until both sides are golden and crisp.
- Let the chimichangas rest for 2 minutes before serving so the hot filling can settle.
Notes
- Use a thick salsa and simmer the filling until excess liquid has reduced to help keep the tortillas crisp.
- Warm stiff tortillas briefly before filling so they fold without cracking.
- For skillet cooking, heat the measured vegetable oil over medium heat and brown the chimichangas seam-side down first for 2 to 3 minutes per side.
- Assembled uncooked chimichangas may be refrigerated for up to 2 days or frozen for up to 2 months. Store cooled cooked leftovers in an airtight container for up to 3 days.
- Reheat in an oven or air fryer to restore the crisp exterior; microwave reheating will produce a softer tortilla.
- Nutrition information is an estimate calculated per serving and may vary by ingredient brand and portion size.
Nutrition
- Serving Size: 1 chimichanga
- Calories: 562 kcal
- Sugar: 2.9 g
- Sodium: 1451 mg
- Fat: 27.1 g
- Saturated Fat: 11.2 g
- Unsaturated Fat: 15.3 g
- Trans Fat: 0.4 g
- Carbohydrates: 48.8 g
- Fiber: 3.9 g
- Protein: 30.0 g
- Cholesterol: 83 mg
Keywords: Beef and Cheese Chimichangas, baked chimichangas, crispy beef chimichangas, Tex-Mex dinner, ground beef recipe, cheesy tortilla recipe