Homemade Vanilla Ice Cream That Tastes Absolutely Amazing
Homemade Vanilla Ice Cream has a way of making the whole kitchen feel slower, sweeter, and a little more old-fashioned in the best possible way. The first time I made it, I was convinced I’d somehow mess up something so classic. I kept peeking into the ice cream maker like it was going to reveal a secret, and honestly, the only “mistake” was that I tasted it too many times before it ever made it to the freezer.
This Homemade Vanilla Ice Cream is rich without feeling heavy, creamy without eggs, and full of that warm vanilla flavor that smells like birthday cake, summer evenings, and someone scraping the last spoonful from the bowl when they think nobody’s looking. It’s the kind of vanilla ice cream that doesn’t need a pile of toppings to prove itself. A scoop on its own is soft, cold, silky, and quietly perfect.
What I love most about this Homemade Vanilla Ice Cream is how unfussy it feels. No custard base. No tempering eggs. No dramatic stovetop moment where you’re staring into a saucepan wondering if you’ve gone too far. Just a simple dairy base, sugar, vanilla, and a tiny bit of salt coming together into something that tastes much more special than the effort suggests.
The Creamy Little Magic Behind Homemade Vanilla Ice Cream
Homemade Vanilla Ice Cream is all about balance. You want enough richness for that smooth, scoopable texture, but not so much that it feels buttery or dense. The combination of heavy cream and whole milk does the heavy lifting here. The cream brings body and softness, while the milk keeps everything from feeling too intense.
I’ve made ice cream recipes before that involve eggs, and they’re delicious, but they can feel like a project. This one skips the custard style completely, which makes it friendly for a lazy afternoon or the kind of evening when you suddenly decide dessert should happen. The texture still turns out beautifully creamy because the base gets warmed gently, chilled properly, and churned until it becomes thick and cloud-like.
The vanilla is the flavor that lingers. It’s warm, sweet, and fragrant, not flat or sugary. When the base is warming on the stove, the scent is soft and cozy, almost like vanilla pudding before it becomes something frozen and scoopable. A small pinch of salt matters too. It doesn’t make the Homemade Vanilla Ice Cream salty; it just wakes everything up so the vanilla tastes deeper and the sweetness feels rounder.
Ingredients That Make This Vanilla Ice Cream Taste Homemade
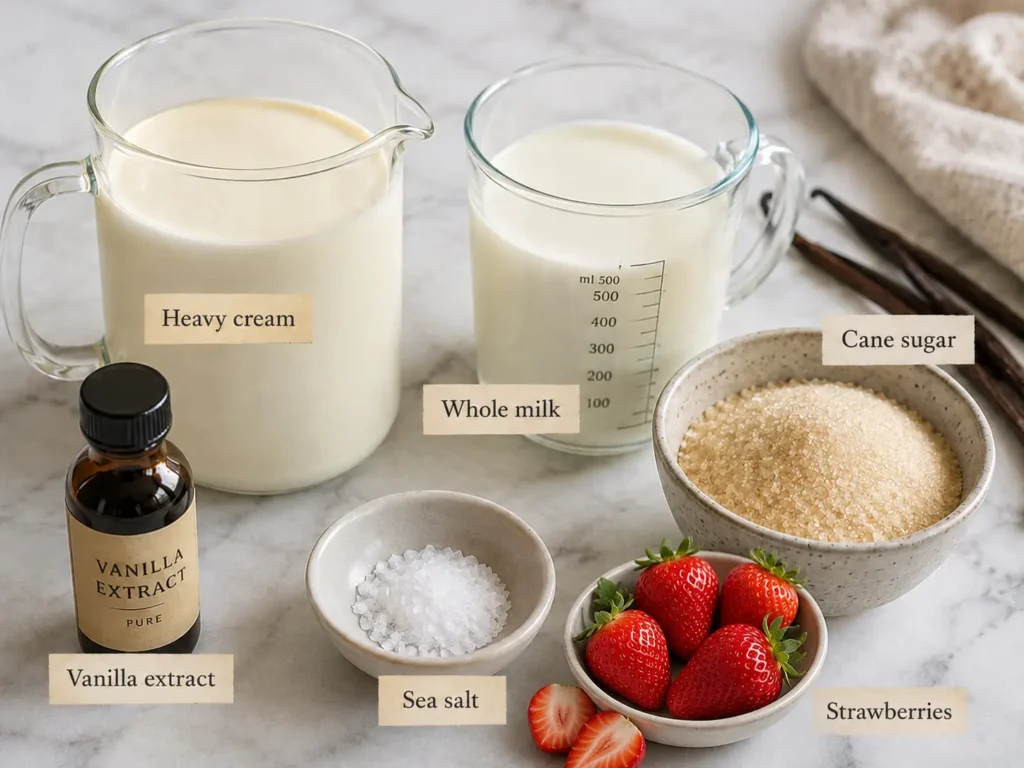
• Heavy cream – This gives Homemade Vanilla Ice Cream its lush, creamy body and helps create that smooth, rich mouthfeel everyone wants in a classic scoop.
• Whole milk – Whole milk keeps the ice cream creamy while lightening the base just enough. Lower-fat milk can make the texture icier, so this is one place where full-fat really earns its spot.
• Cane sugar – Sugar sweetens the base and helps the texture stay softer once frozen. It melts into the dairy so the finished ice cream tastes clean and smooth.
• Vanilla extract – This is where the cozy, familiar flavor comes from. Vanilla bean paste can also work beautifully if you like those tiny specks and a deeper vanilla look.
• Sea salt – Just a little salt sharpens the flavor and keeps the sweetness from tasting one-note.
See the recipe card below for the full list of ingredients and measurements.
The Gentle Way I Make the Ice Cream Base
The best Homemade Vanilla Ice Cream starts before the churning ever happens. The ice cream maker bowl needs to be deeply frozen, and I’ve learned not to rush that part. I once thought, “Eh, it’s cold enough,” and ended up with a sad, sloshy situation that tasted great but looked more like a milkshake with commitment issues. Freeze the bowl properly and the rest of the recipe behaves.
To make the base, combine the cream, milk, sugar, vanilla, and salt in a saucepan and warm it gently. You’re not trying to boil anything. You’re just encouraging the sugar to dissolve and letting the vanilla bloom into the dairy. Whisk often and keep the heat mellow. The mixture should feel warm and smooth, not steamy and dramatic.
Once the sugar has disappeared into the base, pour everything into a heatproof bowl, cover it, and let it chill. This is the part that asks for patience, and yes, it’s annoying when you already want ice cream. But a cold base churns better. It thickens better. It gives you Homemade Vanilla Ice Cream that tastes creamy instead of icy.
When the base is cold, whisk it again before it goes into the ice cream maker. That quick stir pulls everything back together and makes the texture more even. Then churn it according to your machine’s instructions. Watching it go from liquid to soft, billowy ice cream is oddly satisfying. It starts thin, then gets thicker around the edges, and eventually turns into something that looks like soft serve.
Right after churning, Homemade Vanilla Ice Cream will be soft and dreamy. You can absolutely sneak a spoonful at this stage. I do. But for a firmer, more classic scoop, transfer it to an airtight container and freeze it until it sets up. That’s when it becomes the kind of ice cream that curls beautifully onto a scoop and holds its shape in a cone.
My Best Texture Tips for Soft, Scoopable Ice Cream
For smooth Homemade Vanilla Ice Cream, the biggest thing is temperature. A fully frozen bowl and a thoroughly chilled base make a huge difference. If either one is too warm, the ice cream won’t thicken the same way, and you may end up with something icier than you hoped.
Don’t swap the whole milk for skim or reduced-fat milk unless you’re okay with a less creamy result. Ice cream needs fat for that soft, velvety texture. It’s not just about richness; it’s also about how the mixture freezes. The dairy creates a base that feels plush instead of crunchy.
Once the ice cream is churned, press a piece of plastic wrap or foil right against the surface before sealing the container. It’s a tiny step, but it helps protect the top from ice crystals. Homemade Vanilla Ice Cream is at its easiest to scoop early on, and it gets firmer the longer it sits in the freezer. When it’s too hard, just let it soften briefly at room temperature before scooping.
Toppings and Mix-Ins That Let Vanilla Shine
Homemade Vanilla Ice Cream is the dessert version of a white linen shirt. It goes with everything, but it also looks great all by itself. A plain scoop has that clean vanilla flavor and creamy finish that makes you remember why vanilla is a classic, not a compromise.
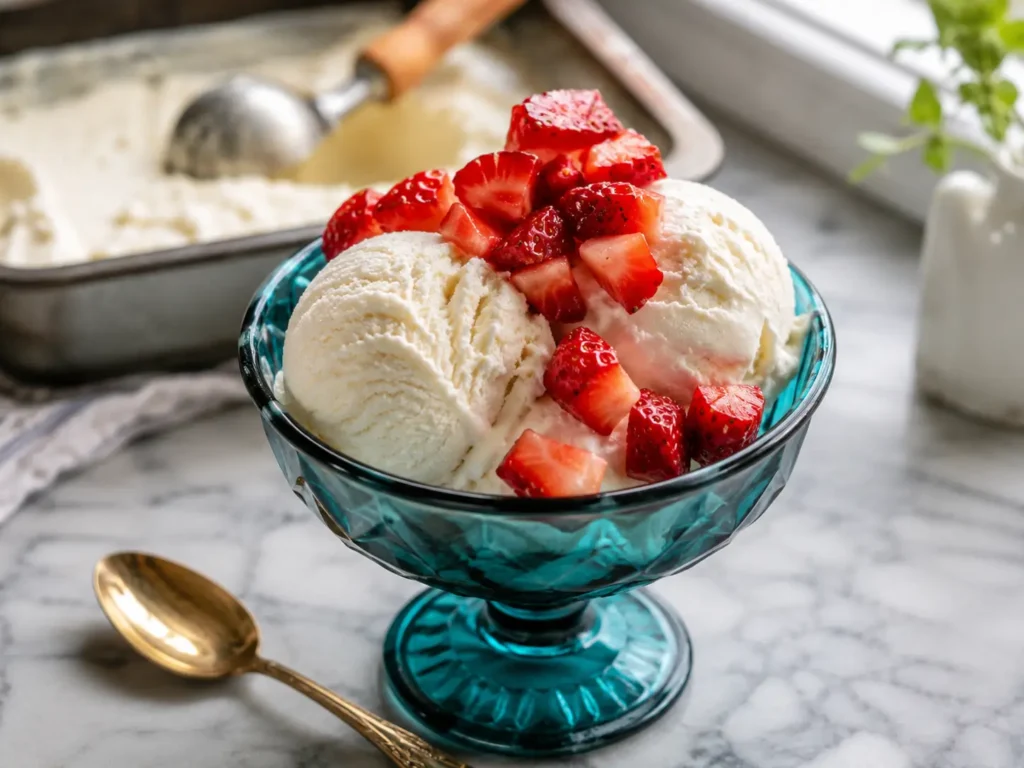
For something fruity, spoon over strawberry compote, blueberry compote, diced bananas, cherries, or fresh berries. The cold creaminess against juicy fruit is so good, especially when the fruit is slightly tart. It makes the vanilla taste even warmer.
For a nutty twist, add a drizzle of peanut butter or almond butter, then scatter toasted almonds, peanuts, or shredded coconut over the top. The crunch against the soft ice cream is the whole point. Chocolate is always welcome too. Chocolate chips, cookie crumbles, brownie pieces, or a ribbon of hot fudge can turn Homemade Vanilla Ice Cream into a sundae that disappears fast.
You can also fold finely diced mix-ins into the ice cream right after churning. Fresh strawberries, mini chocolate chips, cookie bits, or brownie crumbs all work nicely. The trick is to keep mix-ins small so they scatter through the ice cream instead of freezing into hard chunks. I like folding them in while the ice cream is still soft because everything blends in without crushing the texture.
Simple Ways to Serve and Store Homemade Vanilla Ice Cream
Homemade Vanilla Ice Cream is wonderful in a cone, but it’s also ridiculously good next to warm desserts. Spoon it over cherry pie, apple pie, peach crisp, grilled peaches, peach cobbler, strawberry shortcake, blueberry cobbler, or rhubarb crisp. The contrast of warm fruit and cold vanilla cream is the kind of thing that makes people go quiet for a second.
For storage, move the soft ice cream from the machine into an airtight freezer-safe container. Smooth the top with a spatula, cover the surface, seal the container, and freeze it. The texture will be softer and easier to scoop at first, then firmer later. That’s normal for Homemade Vanilla Ice Cream, especially without stabilizers or extra ingredients.
If it feels too firm straight from the freezer, give it a few minutes on the counter. Don’t fight it with the scoop. Let it relax a little, then scoop. You’ll get cleaner curls, softer edges, and a much nicer bowl of ice cream.
Recipe Card
Homemade Vanilla Ice Cream
Prep Time: 30 minutes
Chilling Time: 2 hours
Total Time: 2 hours 30 minutes
Servings: 4 to 8
Yield: 1 quart
Equipment
Ice cream maker
Ingredients
- 1½ cups heavy cream
- 1½ cups whole milk
- ⅔ cup cane sugar
- 2 teaspoons vanilla extract
- ⅛ teaspoon sea salt
Instructions
- Add the heavy cream, whole milk, cane sugar, vanilla extract, and sea salt to a medium saucepan. Warm over medium-low heat, whisking frequently, for 5 minutes, or until the sugar has dissolved and the mixture is warmed through.
- Pour the mixture into a heatproof bowl. Cover and chill for 2 hours or overnight.
- Remove the chilled ice cream base from the refrigerator and whisk it well. Churn in an ice cream maker according to the manufacturer’s instructions, typically 20 to 30 minutes.
- Serve right away for a soft texture, or transfer the ice cream to an airtight container and freeze for 2 to 4 hours for a firmer scoop.
- Store in an airtight container in the freezer for up to 1 month. If the ice cream is too firm to scoop straight from the freezer, let it sit at room temperature for a few minutes before serving.
Conclusion
There’s something quietly lovely about pulling a container of Homemade Vanilla Ice Cream from the freezer and seeing those soft, creamy scoops curl into the bowl. It smells sweet and mellow, tastes rich without being fussy, and melts into that silky vanilla puddle everyone secretly loves. Serve it with warm pie, fresh berries, or just a spoon and a quiet minute at the counter.
FAQs about Homemade Vanilla Ice Cream
How long does Homemade Vanilla Ice Cream last in the freezer?
Homemade Vanilla Ice Cream keeps well in an airtight freezer-safe container for up to 1 month. Pressing plastic wrap or foil against the surface helps prevent ice crystals. Let it soften for a few minutes before scooping if it freezes firm.
Can I make Homemade Vanilla Ice Cream without an ice cream maker?
This recipe is designed for an ice cream maker, so the texture may change without one. Churning adds air and helps create that creamy, scoopable finish. A no-churn method would need different ratios and ingredients.
Can I use low-fat milk instead of whole milk?
Whole milk gives the ice cream a smoother, creamier texture. Low-fat milk can make the finished ice cream icier and less rich. For the best vanilla ice cream texture, stick with whole milk and heavy cream.
What can I serve with homemade vanilla ice cream?
It’s wonderful with warm fruit desserts, brownies, chocolate sauce, berry compote, or toasted nuts. Fresh peaches, cherries, strawberries, and crumbled cookies also work beautifully. The clean vanilla flavor makes it easy to pair with almost anything sweet.
Homemade Vanilla Ice Cream Recipe

Homemade Vanilla Ice Cream turns a handful of simple ingredients into a cool, creamy scoop with warm vanilla flavor and a smooth finish.
- Prep Time: 30 minutes
- Total Time: 2 hours 30 minutes
- Yield: Serves 4 to 8 1x
- Category: Dessert
- Method: Ice Cream Maker
Ingredients
- 1½ cups rich heavy cream
- 1½ cups full-fat whole milk
- ⅔ cup cane sugar
- 2 teaspoons pure vanilla extract
- ⅛ teaspoon fine sea salt
Instructions
- Pour the heavy cream, whole milk, cane sugar, vanilla extract, and sea salt into a medium saucepan.
- Set the pan over medium-low heat and whisk frequently for 5 minutes, just until the sugar melts into the dairy and the mixture feels warm.
- Transfer the warmed base to a heat-safe bowl, cover it, and refrigerate for 2 hours or leave it chilling overnight.
- Take the cold base from the refrigerator and whisk it until smooth and even.
- Pour the mixture into an ice cream maker and churn according to your machine’s directions, usually 20 to 30 minutes.
- Enjoy it right away for a soft, creamy texture, or spoon it into an airtight container and freeze for 2 to 4 hours for firmer scoops.
- Keep leftovers sealed in the freezer for up to a month. Let the ice cream rest briefly at room temperature if it feels too hard to scoop.
Notes
- Freeze the ice cream maker bowl at least 12 hours before churning so the base can thicken properly.
- The recipe makes 1 quart.
- The ice cream will be soft when it first finishes churning.
- For extra texture, fold in finely chopped fruit, cookie pieces, brownie bits, or mini chocolate chips after churning.
Keywords: Homemade Vanilla Ice Cream, homemade ice cream, vanilla ice cream, ice cream maker recipe, creamy vanilla dessert