Homemade Banana Ice Cream That Tastes Wonderfully Nostalgic

Homemade Banana Ice Cream always takes me right back to the sticky-hot evenings when the ice cream maker sat outside humming like it had one very important job. The grown-ups would fuss with the ice and rock salt, someone would peek under the towel way too early, and the kitchen would smell like ripe bananas, vanilla, and sweet milk before the freezer ever started turning.
This Homemade Banana Ice Cream is the old-fashioned kind made in an ice cream maker, with mashed bananas folded into a creamy milk mixture until everything tastes mellow, sweet, and deeply banana-forward. It’s not the instant frozen-banana blender version. This is the soft, scoopable, churned banana ice cream that comes out pale yellow, cold and velvety, with little bits of real banana tucked into each spoonful.
The first time I made this batch on my own, I overfilled the canister because I was feeling a little too confident. Don’t do that. Ice cream expands as it freezes, and it does not care about your optimism. Leave it room to churn, and you’ll get that dreamy, creamy texture instead of a sticky little mess around the lid.
The Old-Fashioned Charm Behind Homemade Banana Ice Cream
What makes Homemade Banana Ice Cream so special is that it tastes like actual bananas, not banana candy. The flavor is soft and rounded, with the vanilla smoothing everything out and the milks adding that rich, old-school creaminess. It’s sweet, but not sharp. Creamy, but not heavy in a fussy way.
This is the kind of banana ice cream that belongs in a big bowl after a cookout, on a paper plate beside a slice of cake, or straight from the ice cream maker while everyone is still standing around pretending they only want “one little taste.”
The texture starts out almost like banana soft serve when it’s freshly churned. It’s cold, thick, and silky, with a slightly fluffy finish from the churning. After a little time in the freezer, it firms up more, but it still keeps that homemade character. It’s not perfectly smooth like store-bought ice cream, and honestly, that’s part of the appeal.
Ingredients That Give This Banana Ice Cream Its Creamy Soul
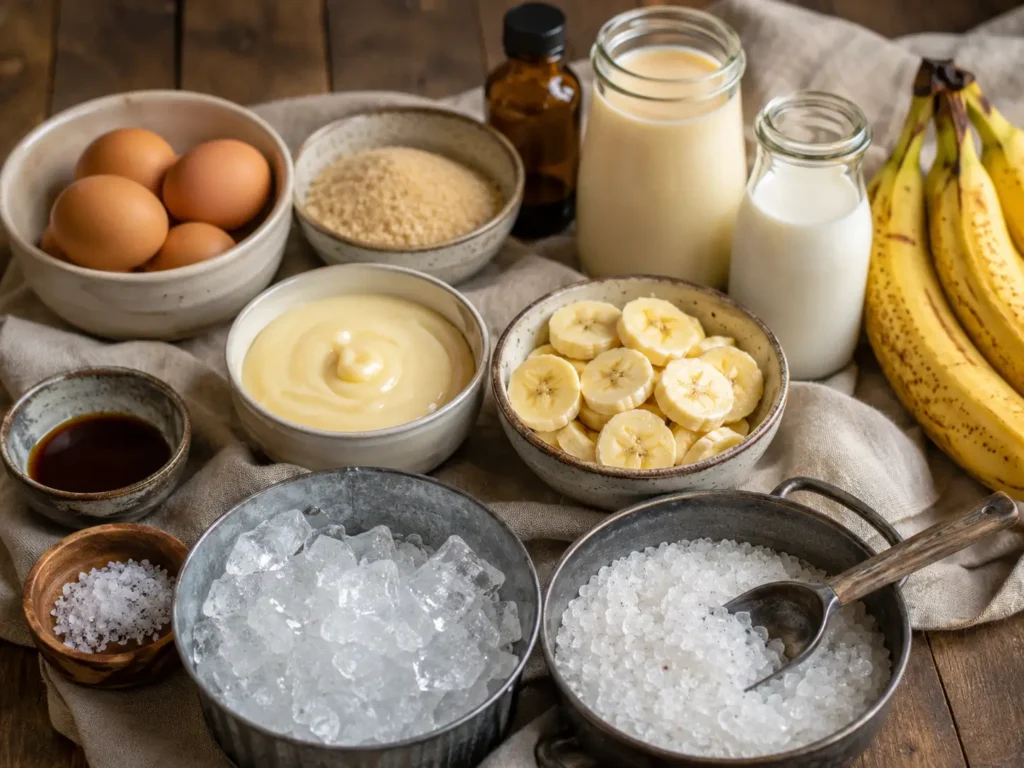
The ingredient list for Homemade Banana Ice Cream is wonderfully familiar. Nothing fancy, nothing that makes you wander three grocery aisles muttering to yourself. Each ingredient has a job, and together they make a creamy banana dessert that feels nostalgic without being dull.
• Eggs – Give the ice cream body and richness, helping the mixture churn into a creamy, old-fashioned texture. Since this recipe uses eggs, pay attention to the safety note in the recipe card.
• Cane sugar – Sweetens the base and blends beautifully with the ripe bananas. Regular granulated sugar can work too.
• Vanilla extract – Adds warmth and rounds out the banana flavor so the ice cream tastes soft and fragrant instead of flat.
• Sweetened condensed milk – Brings thick sweetness and that classic homemade ice cream richness.
• Evaporated milk – Adds creamy depth without making the ice cream overly heavy.
• Sea salt – A small but important touch that keeps the sweetness balanced.
• Bananas – The heart of this Homemade Banana Ice Cream, adding fresh fruit flavor, natural sweetness, and little tender bits throughout.
• Whole milk – Helps fill out the ice cream base and gives it a smooth, creamy finish.
• Crushed ice – Surrounds the canister and helps freeze the ice cream as it churns.
• Rock salt – Works with the ice to lower the temperature around the canister so the ice cream freezes properly.
See the recipe card below for the full list of ingredients and measurements.
Mixing the Banana Ice Cream Base Without Overthinking It
Start by blending the eggs and sugar until they look creamy and smooth. You don’t need to make this complicated, but you do want the mixture well combined. A stand mixer, hand mixer, or blender makes this part easy, especially if you’re trying to avoid little streaks of egg or sugar in the base.
Next comes the vanilla. The second it hits the bowl, the whole mixture starts smelling like dessert. Then the canned milks go in, turning everything glossy and pale. This is when the base starts to look like it’s actually becoming Homemade Banana Ice Cream instead of just a bowl of ingredients.
Add the salt, then mash the bananas. I like the bananas soft and ripe, the kind with plenty of brown freckles on the peel. They mash easily and bring the best flavor. Don’t worry about getting them perfectly smooth. A few tiny banana bits are lovely here. They give each scoop a fresh, homemade feel.
Stir the mashed bananas into the liquid base, then pour everything into the metal canister of the ice cream maker. Add the whole milk last, filling the canister only partway so the mixture has space to expand. That little bit of restraint pays off once the churning begins.
Churning Homemade Banana Ice Cream the Backyard Way
Once the lid is on the canister, place it into the ice cream maker bucket and lock the motor into place. When the machine starts running, there’s that familiar churn-churn-churn sound that somehow makes the whole house feel like summer.
Add the crushed ice gradually around the outside of the canister, layering it with rock salt as you go. The salt and ice do the quiet science work here, chilling the canister enough to freeze the banana ice cream while the paddle keeps everything moving. I always try to add the ice slowly instead of dumping it all in at once, mostly because I’ve learned the hard way that crushed ice likes to bounce everywhere.
If the motor struggles or acts like it wants to stop too soon, a bit of water around the ice can help things keep moving. The goal is steady churning until the motor finally stops on its own. That usually means the Homemade Banana Ice Cream has thickened and frozen enough.
When the churning is finished, unplug the machine right away. Brush away any ice or rock salt from the top before opening the canister, because salty ice water has no business sneaking into your beautiful banana ice cream. Lift out the paddle, scrape off the thick creamy bits, and serve it while it’s soft and freshly churned.
Scoops, Storage, and Little Banana Ice Cream Extras
Freshly churned Homemade Banana Ice Cream is almost impossible to resist. It’s soft, creamy, and cold enough to make the spoon fog a little when it hits the bowl. I love it plain because the banana flavor really shines, but it also plays nicely with toppings.
A drizzle of chocolate syrup makes it taste a little like a banana split. Caramel gives it a buttery sweetness. Crushed cookies add crunch, and fruit jam swirled over the top brings a bright, tangy contrast. If you’re serving kids, candy pieces or brownie chunks usually disappear into the bowls pretty fast.
For leftovers, spoon the ice cream into freezer-safe containers with lids. Smaller containers are handy because they freeze faster and make it easier to grab a serving or two later. Store them on a freezer shelf rather than the door so the temperature stays more consistent. Homemade Banana Ice Cream is best enjoyed within about a month, while the flavor is still fresh and the texture hasn’t picked up freezer burn.
If the ice cream gets very firm after freezing, let it sit at room temperature briefly before scooping. It softens into that creamy banana texture again without much fuss.
Recipe Card
Homemade Banana Ice Cream
Old-fashioned Homemade Banana Ice Cream made with ripe bananas, sweetened condensed milk, evaporated milk, whole milk, vanilla, eggs, ice, and rock salt in a classic ice cream maker.
Course: Desserts
Cuisine: American
Prep Time: 15 minutes
Cook Time: 30 minutes
Total Time: 45 minutes
Servings: 20
Calories: 227 kcal
Equipment
• Stand mixer or blender
• 4-quart electric ice cream maker
• Ice cream scoop
• Ice cream storage container with lid
Ingredients
Ice Cream
• 6 large eggs
• 3/4 cup cane sugar
• 4 teaspoons vanilla extract
• 14 ounces sweetened condensed milk
• 24 ounces evaporated milk
• 1 teaspoon sea salt
• 4 bananas
• 6 cups whole milk
Freezing Supplies
• 16 cups crushed ice
• 3 cups rock salt
Instructions
- Cream the eggs and cane sugar together until the mixture is smooth and well blended.
- Add the vanilla extract and mix it into the base.
- Pour in the sweetened condensed milk and evaporated milk, then blend until everything is fully combined.
- Add the sea salt and mix again.
- Peel and mash the bananas, then stir them into the liquid ice cream mixture.
- Pour the banana ice cream base into the metal canister of the ice cream maker.
- Add the whole milk, filling the canister about 3/4 full so there is room for the ice cream to expand as it freezes.
- Place the lid on the canister and set it inside the bucket of the ice cream maker.
- Attach and clamp on the motor, then plug in the ice cream maker so it begins churning.
- Gradually add crushed ice around the canister. If needed, add up to a gallon of water to help the motor keep turning smoothly.
- Layer the rock salt with the ice, making sure to finish with rock salt on top.
- Let the ice cream maker run until the motor stops, which means the Homemade Banana Ice Cream has frozen.
- Unplug the ice cream maker immediately once the motor stops.
- Wipe away extra ice and rock salt from the lid and around the top of the canister.
- Remove the lid and churning paddle, then serve the ice cream right away.
- If not serving immediately, remove the motor, keep the lid on, add more ice over the top, and cover with a towel or two to help keep it cold.
Notes
Consuming raw or undercooked eggs may increase the risk of foodborne illness, especially for people with certain medical conditions.
Half-and-half may be used instead of whole milk for an even creamier texture.
Rock salt can be found at grocery stores, online, hardware stores, or feed stores.
For canned milk, Eagle Brand sweetened condensed milk and Milnot evaporated milk are traditional options, but other brands can also work.
Store leftover Homemade Banana Ice Cream in freezer-safe containers with lids. Keep containers on freezer shelves rather than in the freezer door to help reduce melting and freezer burn. Homemade ice cream usually keeps for up to about 1 month in the freezer.
Conclusion
There’s something so comforting about scooping Homemade Banana Ice Cream while it’s still soft, cold, and creamy from the churn. The banana flavor is sweet and mellow, with that little whisper of vanilla that makes every bite taste like summer on a spoon. Serve it in chilled bowls, tuck it beside a slice of cake, or let it melt just slightly over warm brownies for the kind of dessert that makes everyone go quiet for a minute.
More Relevant Recipes
Homemade Vanilla Ice Cream That Tastes Absolutely Amazing
FAQs about Homemade Banana Ice Cream
Can I freeze Homemade Banana Ice Cream after churning?
Yes, you can freeze Homemade Banana Ice Cream after it’s churned. Spoon it into freezer-safe containers with tight lids, then store it on a freezer shelf instead of the door. Let it soften briefly at room temperature before scooping if it becomes very firm.
Can I make homemade banana ice cream creamier?
Yes. The original recipe notes that half-and-half can be used instead of whole milk for a creamier texture. It will make the banana ice cream richer and slightly more indulgent. Just keep the rest of the recipe the same.
How long does banana ice cream last in the freezer?
Homemade banana ice cream is usually best within about one month. Keep it covered tightly to protect the flavor and texture. Freezer burn can dull the banana taste and make the ice cream icy.
What can I serve with Homemade Banana Ice Cream?
Homemade Banana Ice Cream is lovely on its own, but it’s also great with chocolate syrup, caramel, crushed cookies, or brownies. For a banana-split feel, add whipped cream and a few chopped nuts. Fresh berries also add a bright, juicy contrast.
Homemade Banana Ice Cream Recipe

This Homemade Banana Ice Cream is a creamy, old-fashioned churned dessert with ripe banana flavor, vanilla warmth, and a soft homemade texture.
- Prep Time: 15 minutes
- Cook Time: 30 minutes
- Total Time: 45 minutes
- Yield: 20 servings 1x
- Category: Desserts
- Method: Ice Cream Maker
- Cuisine: American
Ingredients
- 6 large eggs
- 3/4 cup cane sugar
- 4 teaspoons vanilla extract
- 14 ounces sweetened condensed milk
- 24 ounces evaporated milk
- 1 teaspoon sea salt
- 4 bananas
- 6 cups whole milk
- 16 cups crushed ice
- 3 cups rock salt
Instructions
- Beat the eggs with the cane sugar until the mixture looks smooth and evenly blended.
- Pour in the vanilla extract and stir it through the base.
- Add the sweetened condensed milk and evaporated milk, then mix until the liquids come together.
- Sprinkle in the sea salt and blend again.
- Peel the bananas, mash them well, and fold them into the ice cream mixture.
- Transfer the banana mixture to the metal canister of a 4-quart ice cream maker.
- Pour in the whole milk, filling the canister about 3/4 full so the ice cream has space to expand while freezing.
- Secure the lid, set the canister inside the ice cream maker bucket, attach the motor, clamp it in place, and plug in the machine.
- Add the crushed ice slowly around the canister. If the motor begins to strain, add up to 1 gallon of water to help the ice move more freely.
- Layer the rock salt with the ice, finishing with a layer of salt on top.
- Let the machine churn until the motor stops, then unplug it right away.
- Brush away any loose ice or salt from the lid and top edge of the canister.
- Remove the lid and paddle, then scoop and serve the ice cream while it is fresh and creamy.
- If serving later, remove the motor, keep the canister covered, add more ice over the top, and drape towels over the bucket to help hold in the cold.
Notes
- This recipe uses eggs, so anyone concerned about raw or undercooked eggs should use appropriate food-safety care.
- Half-and-half can replace the whole milk for a richer, silkier batch.
- Rock salt is often sold at grocery stores, hardware stores, feed stores, and online.
- For the canned milk, use 14 ounces sweetened condensed milk and 24 ounces evaporated milk as listed.
- Store leftovers in lidded freezer-safe containers. Keep them on a freezer shelf instead of the door for steadier temperature.
- Homemade ice cream is usually best within about 1 month.
Nutrition
- Serving Size: 1 g
- Calories: 227 kcal
- Sugar: 28 g
- Sodium: 227 mg
- Fat: 8 g
- Saturated Fat: 5 g
- Unsaturated Fat: 3 g
- Trans Fat: 0.01 g
- Carbohydrates: 31 g
- Fiber: 1 g
- Protein: 8 g
- Cholesterol: 81 mg
Keywords: Homemade Banana Ice Cream, banana ice cream, old-fashioned ice cream, churned ice cream, homemade frozen dessert